Notes on self-hosting essential apps
These notes contain a relatively simple guide to set-up a fresh Ubuntu server and self-host a number of (what I consider) essential apps.
There are plenty of reasons you want to self-host applications (privacy, who owns your data, your data being stolen, etc.). On the other hand, self-hosting forces you to be very proactive about your data, chiefly:
- establish a rock-solid backup policy
- keep your server secure
Both back-up and security are not easy feat to get right, so self-hosting requires a certain degree of discipline. Having said that, with a relatively small time-investment, I have never suffered any major (or minor) data-loss or data breach.
I started to look for a self-hosted alternative to Dropbox back in 2013, mostly out of privacy concerns, and I continued to add more self-hosted applications to my server (a 4GB RAM box hosted with Hetzner). At this point (end of 2016), my digital backbone is almost completely self-hosted, except for an e-mail server, which I happily leave to Fastmail.
The configuration process described here is based on Ubuntu 16.04 LTS and does install and configure the following applications:
- Resilio Sync (formerly known as BitTorrent Sync)
- Baïkal Baïkal (Cal and CardDAV server)
- Tiny Tiny RSS
- DokuWiki
- Piwigo (photo gallery)
All the web-facing applications use HTTPS (thanks Let’s Encrypt!).
It is assumed that the server IP address is associated to a DNS entry and that all the applications have a sub domain, like so:
- btsync.mydomain.com
- dav.mydomain.com
- wiki.mydomain.com
… and so on.
There is an incredible number of self-hosted applications which can be used to replace closed-source, paid applications. A good starting point is this ‘awesome’ list and this sub-reddit.
OS
I assume that Ubuntu 16.04 LTS is installed on a new server and the logged in user is root.
The very first commands to run will update the package repositories and the system.
apt update && sudo apt upgrade
Change the root password:
passw
Setup a login user, with sudo permission
adduser youruser
gpasswd -a youruser sudo
Hardening
I don’t want to be hacked, rooted or my server to turn into a remotely controlled zombie. Harden.Your.Server. I have been using this excellent collection of security recomendations to harden my box, and you should do the same.
The crucial bits are documented here. I warmly recommend to read the above guide and decide for yourself how paranoid you want to be when hardening your server.
Firewall
# install UFW (Uncomplicated Firewall)
sudo apt-get install ufw

# allow ssh and apache 80/443
sudo ufw allow ssh
sudo ufw allow "Apache Full"

# enable the firewall
sudo ufw enable
Harden SSH
Just follow this setup. It shows how to set up public key authentication for the new user and disable password authentication.
Be extra careful when editing the server’s SSL configuration. It is scary simple to get locked out of a server.
Secure shared memory
Shared memory can be used in an attack against a running service, apache2 or httpd for example. More info here. To secure the shared memory:
sudo vim /etc/fstab
Add the following line:
tmpfs /run/shm tmpfs defaults,noexec,nosuid 0 0
Save and reboot.
Disable SSL v3
Here’s why you want to disable SSL v3.
TLTR; it’s broken and vulnerable.
sudo vim /etc/apache2/mods-available/ssl.conf
Change the line:
SSLProtocol all -SSLv3
To:
SSLProtocol all -SSLv2 -SSLv3
Restart apache:
sudo apache2ctl configtest && sudo service apache2 restart
Setup fail2ban
Fail2ban temporarily rejects IP addresses that are trying to do something dodgy with your server. A classical example is a client try to brute force the SSH password. The default Fail2ban configuration only protectes SSH, but it’s (relatively) easy to configure it to add more checks (eg. apache HTTP server)
sudo apt-get install fail2ban -y
Installing applications
LAMP Stack
Before installing any application, we want to install Apache2, MySQL and PHP.
You can get away with a one liner:
sudo apt-get install apache2 mysql-server php libapache2-mod-php php-mcrypt php-mysql
But you really want to follow this thorough guide, from the guys @DigitalOcean .
Resilio Sync
Resilio Sync is the new incarnation of (the formerly known) BitTorrent Sync. In June, BitTorrent inc. announced that the Sync product was going to be moved into a new company, called Resilio. This news made me a bit nervous, but so far it seems that the new company is delivering. They recently released version 2.4 of the Sync client.
Resilio Sync is essentially a Dropbox replacement: you should be aware that it is a closed-source software. There are open-source alternatives, such as SyncThing or Seafile. I consider BitTorrent Sync (now Resilio Sync) the easiest to setup and to run and the more reliable.

Before installing the Sync client, create the folder where the synchronized files will be stored.
# change your-user with the directory name of the user created before
sudo apt-get install acl
mkdir /home/your-user/btsync_share/

sudo setfacl -R -m "u:rslsync:rwx" /home/your-user/btsync_share/
To install Resilio Sync, start by creating a new apt source file
echo 'deb http://linux-packages.getsync.com/resilio-sync/deb resilio-sync non-free' | sudo tee --append /etc/apt/sources.list.d/resilio-sync.list
Add public key with the following command:
wget -qO - https://linux-packages.getsync.com/resilio-sync/key.asc | sudo apt-key add -
Install
sudo apt-get update && sudo apt-get install resilio-sync
Start Resilio Sync
sudo service resilio-sync start
The Linux version of Resilio Sync has a web-based UI available at 127.0.0.1:8888. The web UI is not accessible from the Internet, so we need to set up a reverse proxy.
First enable the Apache modules required for the reverse proxy to work:
sudo a2enmod proxy
sudo a2enmod proxy_http
sudo a2enmod rewrite
sudo a2enmod deflate
sudo a2enmod headers
sudo a2enmod proxy_balancer
sudo a2enmod proxy_connect
sudo a2enmod proxy_html
Create the Apache configuration for the Resilio Sync UI. Here, I assume that you have a domain name associated to your server and that each application will correspond to a sub-domain
Let’s pretend that the domain name is awesomehosted.com
Create a new Apache configuration file
sudo touch /etc/apache2/sites-available/btsync.awesomehosted.com.conf
Copy the following text to the new file
Enable the configuration and restart Apache
sudo a2ensite btsync.awesomehosted.com.conf
sudo service apache2 restart
If the sub domains are already configured and propagated, you should be able to access the Resilio Sync console
http://btsync.awesomehosted.com
In case you haven’t configured the A records yet, just add an entry to the /etc/hosts of the computer testing the connection
[server ip] btsync.awesomehosted.com
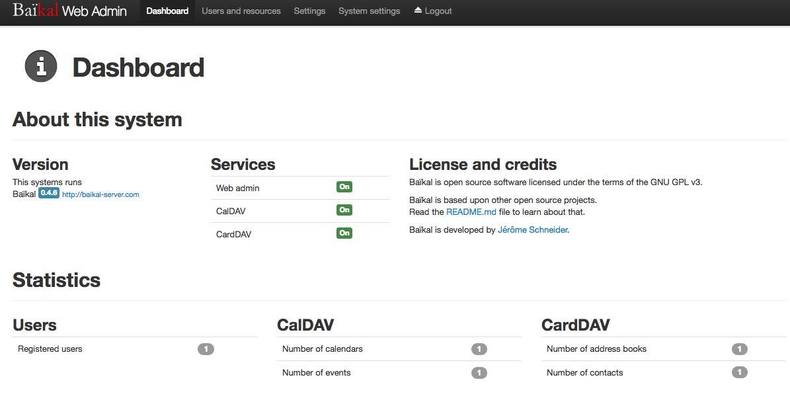
Baïkal
Baïkal is an excellent CalDav and CardDav server. I have been using it for a couple of years, and it totally replaced any other cloud service for syncing contacts and calendar (Apple Cloud, etc.). It is very stable and (kind of) easy to setup. The data are stored on SQLite, but for large dataset it is reccommended to use MySQL. I use SQLite because it’s easy to back up :)
# install the dependencies
sudo apt-get install php7.0-sqlite3 php-xml php7.0-mbstring unzip

# fetch baikal
cd /var/www
sudo wget https://github.com/fruux/Baikal/releases/download/0.4.6/baikal-0.4.6.zip
sudo unzip baikal-0.4.6.zip

# rename the baikal folder
sudo mv baikal dav.awesomehosted.com
sudo rm baikal-0.4.6.zip

# fix permissions
sudo chown -R www-data:www-data dav.awesomehosted.com
Create a new Apache configuration file
sudo touch /etc/apache2/sites-available/dav.awesomehosted.com.conf
Copy the following text to the new file
And enable the configuration
sudo a2ensite dav.awesomehosted.com.conf
sudo service apache2 restart
Hit dav.awesomehosted.com on your browser and you should access the configuration page.
Choose an admin password and pick MySQL or SQLite. If you choose MySQL, you’ll have to create a database first.
I don’t bother creating a MySQL db for Baikal. I have around 1000 contacts and a relatively low number of entries in my calendars and never had a problem. Bonus: SQLite is easier to backup!
As an Android user, I use CardDAV-Sync to syncronize my contacts and CalDav-Sync for the calendar syncronization.
Once you have created a new user (eg. johndoe), the url for the contacts is: http://dav.awesomehosted.com/card.php/addressbooks/johndoe/default/.
The url for the calendar is: http://dav.awesomehosted.com/cal.php/calendars/johndoe/default/.
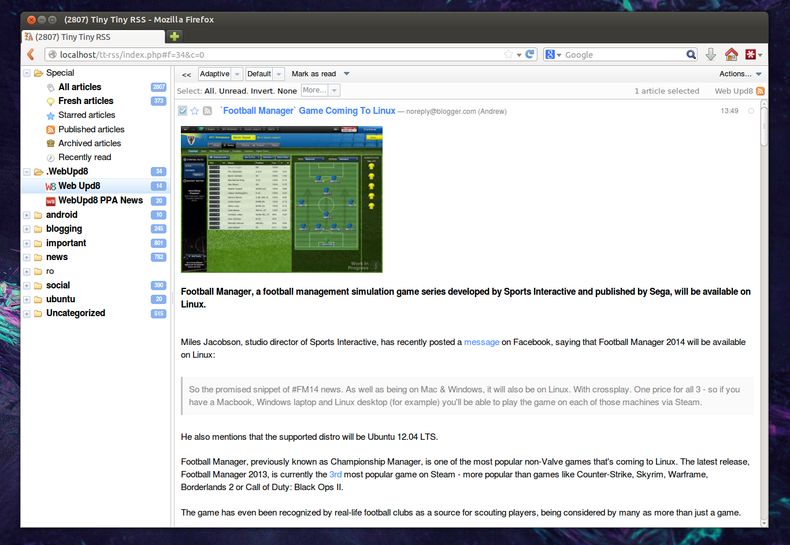
Tiny Tiny RSS
Tiny Tiny RSS (tt-rss for brevity) is a marvellous feed reader, which I use daily. There are lots of self-hosted feed readers out there: I have tried few of them, and I settled with tt-rss. The set-up process is similar to the one used for the other applications.
Install some required PHP dependencies.
sudo apt-get install php-curl php7.0-mbstring php-xml
sudo service apache2 restart
Clone tt-rss
cd /var/www

sudo git clone https://tt-rss.org/git/tt-rss.git tt-rss

sudo mv tt-rss rss.awesomehosted.com

sudo chown -R www-data:www-data rss.awesomehosted.com
Create a new Apache configuration file
sudo touch /etc/apache2/sites-available/rss.awesomehosted.com.conf
Copy the following text to the new file
And enable the configuration
sudo a2ensite rss.awesomehosted.com.conf
sudo service apache2 restart
Create the Tiny Tiny RSS database. Don’t forget to keep the password in a safe place.
mysql -u root -p

mysql> create database ttRssDB;
mysql> grant all on ttRssDB.* to ttRss@localhost identified by 'password';
mysql> flush privileges;
mysql> \q
The first time you hit the url ‘http://rss.awesomehosted.com’, a set-up page is displayed. Admittedly, the setup process of tt-rss it’s a bit quirky.
Fill the configuration form with the information provided during the db creation stage.
Click on the “Test Configuration” button to double-check you can access the database and all required libraries are present. Finally, select “Initialize Database”. Now you should be presented with a textbox containing the php configuration code required to run tt-rss. Press the “Install Configution” button. This will create a config.php file in the root of the main application directory.
You should now be able to access tt-rss. The default username and password is: admin/password. Don’t forget to create a new user and change the administrative password!
The last step required for a fully functional feed reader is creating a cronjob to refresh the feeds at a specified interval.
crontab -e

*/30 * * * \* /usr/bin/php /var/www/tt-rss/update.php --feeds --quiet
Docuwiki
My wiki is probably the most important part of my digital life. I keep track of books I read or I want to read, movies, a ’90s style weblog, ideas and notes. Before starting a personal wiki, I was an heavy user of Evernote. The problem with a note-style knowledge management system, such has Evernote, is that it quickly becomes a huge knowledge sink and the truly important bits of information that I want to retain were lost in the noise of the less important data.
A wiki instead forces me to curate the information that I want to preserve. A wiki is akin to having a paper notebook. It is slower, but it forces me to think about the actual bit of data that I’m working on.
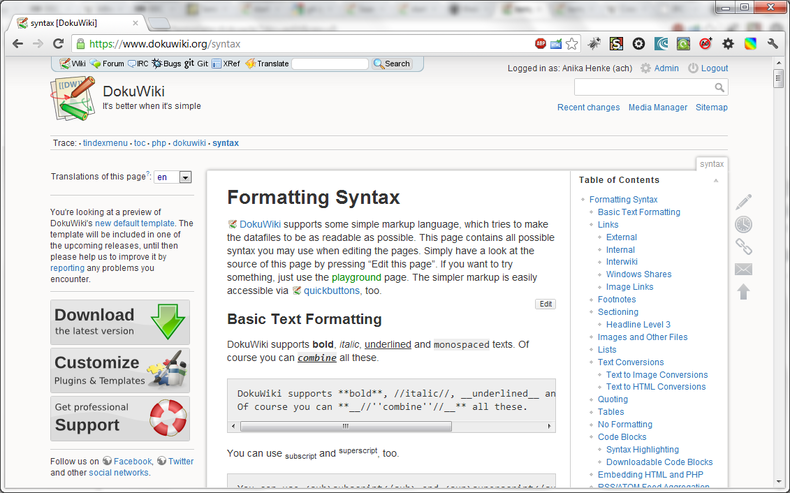
Docuwiki is a very simple wiki platform with a couple of advantages over other wikis: it has a large plugin ecosystem and it is file-based, so super-easy to back-up. No database, less attack-surface. The installation is also straightforward.
cd ~

# download the latest version of docuwiki
wget http://download.dokuwiki.org/src/dokuwiki/dokuwiki-stable.tgz
tar xvf dokuwiki-stable.tgz
sudo mv dokuwiki-2016-06-26a/ /var/www/wiki

# setup folder permissions
sudo chown www-data:www-data -R /var/www/wiki/

# create apache conf file
touch /etc/apache2/sites-available/wiki.awesomehosted.com.conf
Copy the following configuration snippet to the new file
Restart Apache and test the installation by browsing to http://wiki.awesomehosted.com.
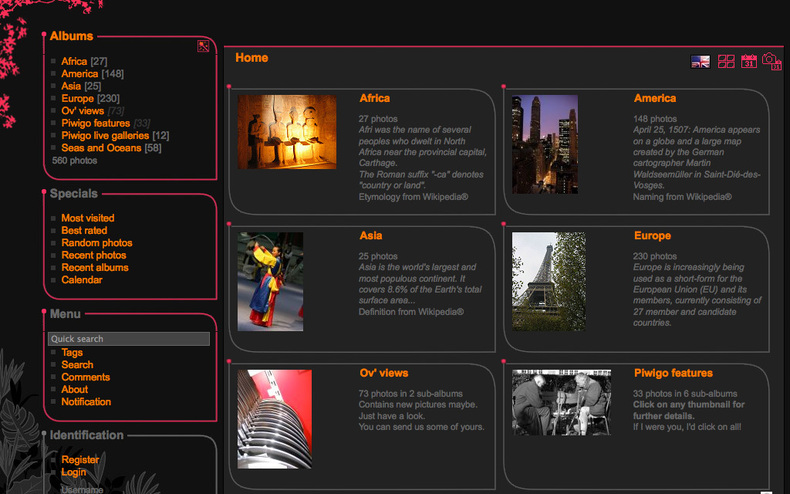
Piwigo
Piwigo is a photo gallery web-application. I use it to share photo galleries with my family. I switched from the very stylish-looking Lychee to Piwigo because Lychee doesn’t support custom ordering of photos in a gallery.
Piwigo setup is straightforward. Start by creating a database. Don’t forget to change the password.
mysql -u root -p

CREATE DATABASE piwigo;

CREATE USER piwigouser@localhost IDENTIFIED BY 'password';

GRANT ALL PRIVILEGES ON piwigo.* TO piwigouser@localhost;

FLUSH PRIVILEGES;

exit
cd ~

sudo apt-get install unzip php-gd

wget "http://piwigo.org/download/dlcounter.php?code=latest" -O piwigo-gallery.zip

sudo unzip piwigo-gallery.zip -d /var/www

sudo mv /var/www/piwigo /var/www/gallery.awesomehosted.nl

sudo chown www-data: -R /var/www/gallery.cryptonomicon.nl/
Create the Apache config file
sudo touch /etc/apache2/sites-available/gallery.awesomehosted.com.conf
Copy the following configuration to gallery.awesomehosted.com.conf
Finally, add the following lines to my.cnf
sudo vim /etc/mysql/my.cnf

[mysqld]
sql-mode=""
This is required to avoid a weird error when changing the order of the photos in the gallery.
Secure the applications with TLS/SSL
Once all the applications are installed, configured and running on port 80 within Apache 2, it’s time to install a TLS/SSL certificate in order to encrypt the traffic between client and server. The obvious choice these days is to use Let’s Encrypt
Let’s Encrypt is a new SSL authority that provides free SSL certificates and a super-simple command line tool to streamline the creation and renewal of certificates.
Let’s start by installing the command line tool.
sudo apt-get install python-letsencrypt-apache
Modify the Apache 2 default virtual host file, 000-default.conf so that the domain name of your server is properly defined.
sudo vim /etc/apache2/sites-available/000-default.conf
Make sure that the ServerName and ServerAlias are pointing to the correct domain name - let’s continue using the fictional awesomehosted.com domain name:
ServerName awesomehosted.com
ServerAlias www.awesomehosted.com
ServerAdmin webmaster@localhost
DocumentRoot /var/www/awesomehosted
I like to configure the root directory with my own index.html, hence DocumentRoot pointing to a non default folder.
Finally, execute the command that will magically install and configure the SSL certificate for the main domain and the subdomains.
letsencrypt --apache -d awesomehosted.com -d www.awesomehosted.com -d btsync.awesomehosted.com -d dav.awesomehosted.com -d rss.awesomehosted.com -d wiki.awesomehosted.com -d gallery.awesomehosted.com
Note that his command will fail if the DNS settings for the domains and subdomains are not properly configured and propagated.
Stay tuned for the second part of these notes, concerning my backup strategy.
Leave a Comment
Your email is used for Gravatar image and reply notifications only. Address will not be published. *
Comments
Gavronsky
Maial
Luciano Fiandesio