Getting started with Mutt on OSX
20/08/2016 I wrote a short upgrade to this guide, that uses the newly released mutt 1.7.0.
Here are some notes on how to get started with mutt and Fastmail on OSX (Yosemite). Most of this stuff applies to Linux as well. You can actually skip this whole mutt-is-awesome rant and checkout the “mutt” section of my doftiles.
Why mutt
mutt is stable, solid, predictable and flexible mail client. Also, I like writing in Vim. And I spend a lot of time in the command line. In the past, mutt was a pain to setup. Just google for “mutt setup” and you will find some monster articles, like this one or this one. Scary shit, uh?
A “normal” setup would include mutt, offlineimap, some smtp client, like msmtp and notmuch for searching your emails. Enough to scare away even the most determined hacker.
My setup is way simpler, since mutt is able to send emails without a third-party smtp client (I don’t know exactly when that option has been introduced in mutt). Additionally, I don’t require to store my emails locally, I don’t need to reply when off-line and I can search using the excellent Fastmail web interface.
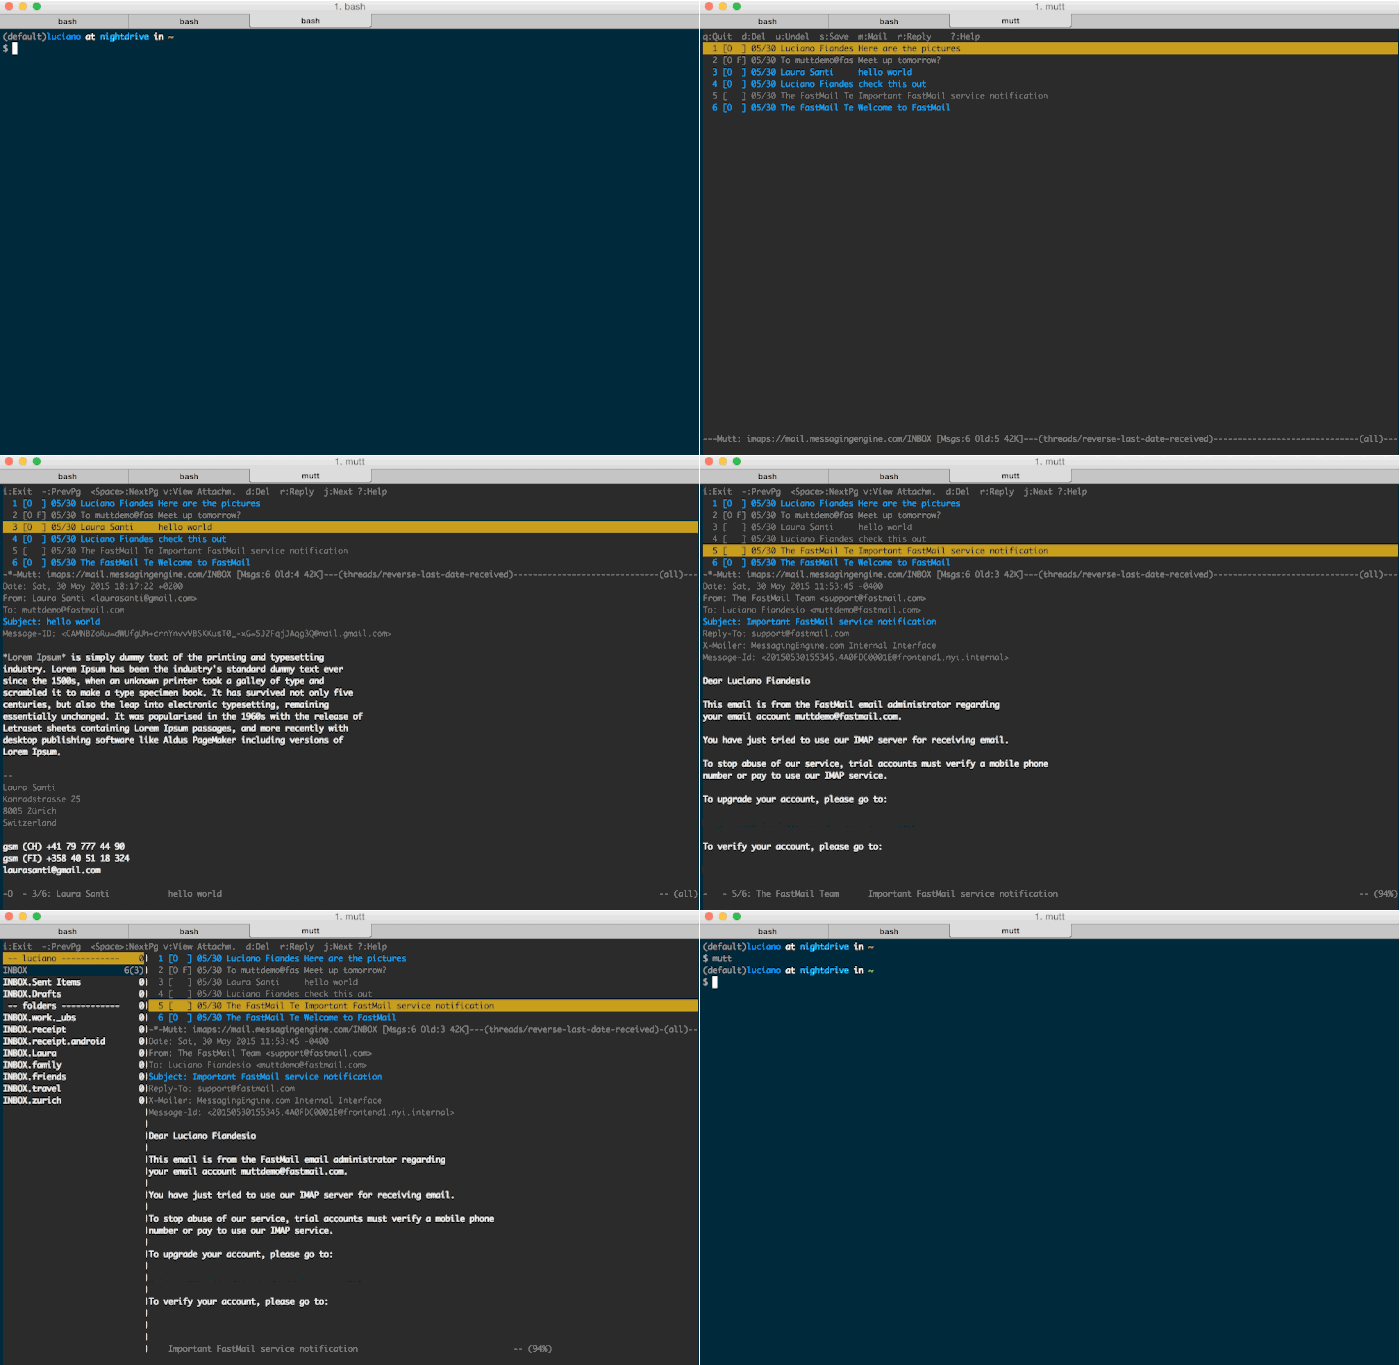
This is how mutt looks like:

Get mutt
Vanilla mutt lacks some of the essential stuff, which is only available through patches. One is the trash patch - as in, send message to trash - and a sidebar to show IMAP folders. Applying a patch is not complicated - get the source, get the patch, make.
In OSX, I can simply use Homebrew and get it done with a simple command.
brew install kevwil/patches/mutt \
    --with-gpgme --with-trash-patch \
    --with-sidebar-patch --with-confirm-attachment-patch
Talking to fastmail
mutt is configured through a .muttrc file. It’s a good idea to keep your configuration well organized and commented, because it can get a messy.
This is the very basic configuration required to fetch and send email through Fastmail.
set my_server       =   mail.messagingengine.com
set my_smtp_server  =   mail.messagingengine.com
set my_user         =   xxx@fastmail.fm
set my_pass         =   "`security find-internet-password -g -a lfi@fastmail.fm 2>&1| perl -e 'if (<STDIN> =~ m/password: "(.*)"$/ ) { print $1; }'`"

set record          =   "imaps://$my_server/INBOX.Sent Items"
set postponed       =   "imaps://$my_server/INBOX.Drafts"

set from            =   "xxx@fastmail.fm"

# Account - SMTP

set smtp_url        = "smtp://$my_user:$my_pass@$my_smtp_server:587"
set smtp_pass       = $my_pass
set imap_user       = $my_user
set imap_pass       = $my_pass
set ssl_force_tls   = yes
set ssl_starttls    = no

#
# Default inbox
#
set spoolfile=imaps://$my_server/INBOX

#
# Default location of mailboxes
#
set folder=imaps://$my_server/INBOX
This is good enough to start reading and sending emails with Fastmail. If you use gmail, there are plenty of tutorials out there that shows an equivalent configuration. You may have noticed that the my_pass variable is using the security command to retrieve the password from the OSX Keychain. I figured it was a good idea to remove my password from the .muttrc file, since I store all this stuff publicly on github.
To add the password to the OSX Keychain, type:
sudo /usr/bin/security -v add-internet-password -a xxx@fastmail.fm -s mail.messagingengine.com -w your-password
Contacts
mutt uses aliases to map a name to an email address. Aliases are stored in a file using a simple format:
alias john John Doe <johndoe@email.com>
The default key binding to add an address from the currently opened mail is a.
I store my contacts in a OwnCloud instance running on my server. Initially, I used a script to convert the vCard contacts into an alias flie, but it has been a sub-optimal solution, because I had to download the vCard file and re-import periodically.
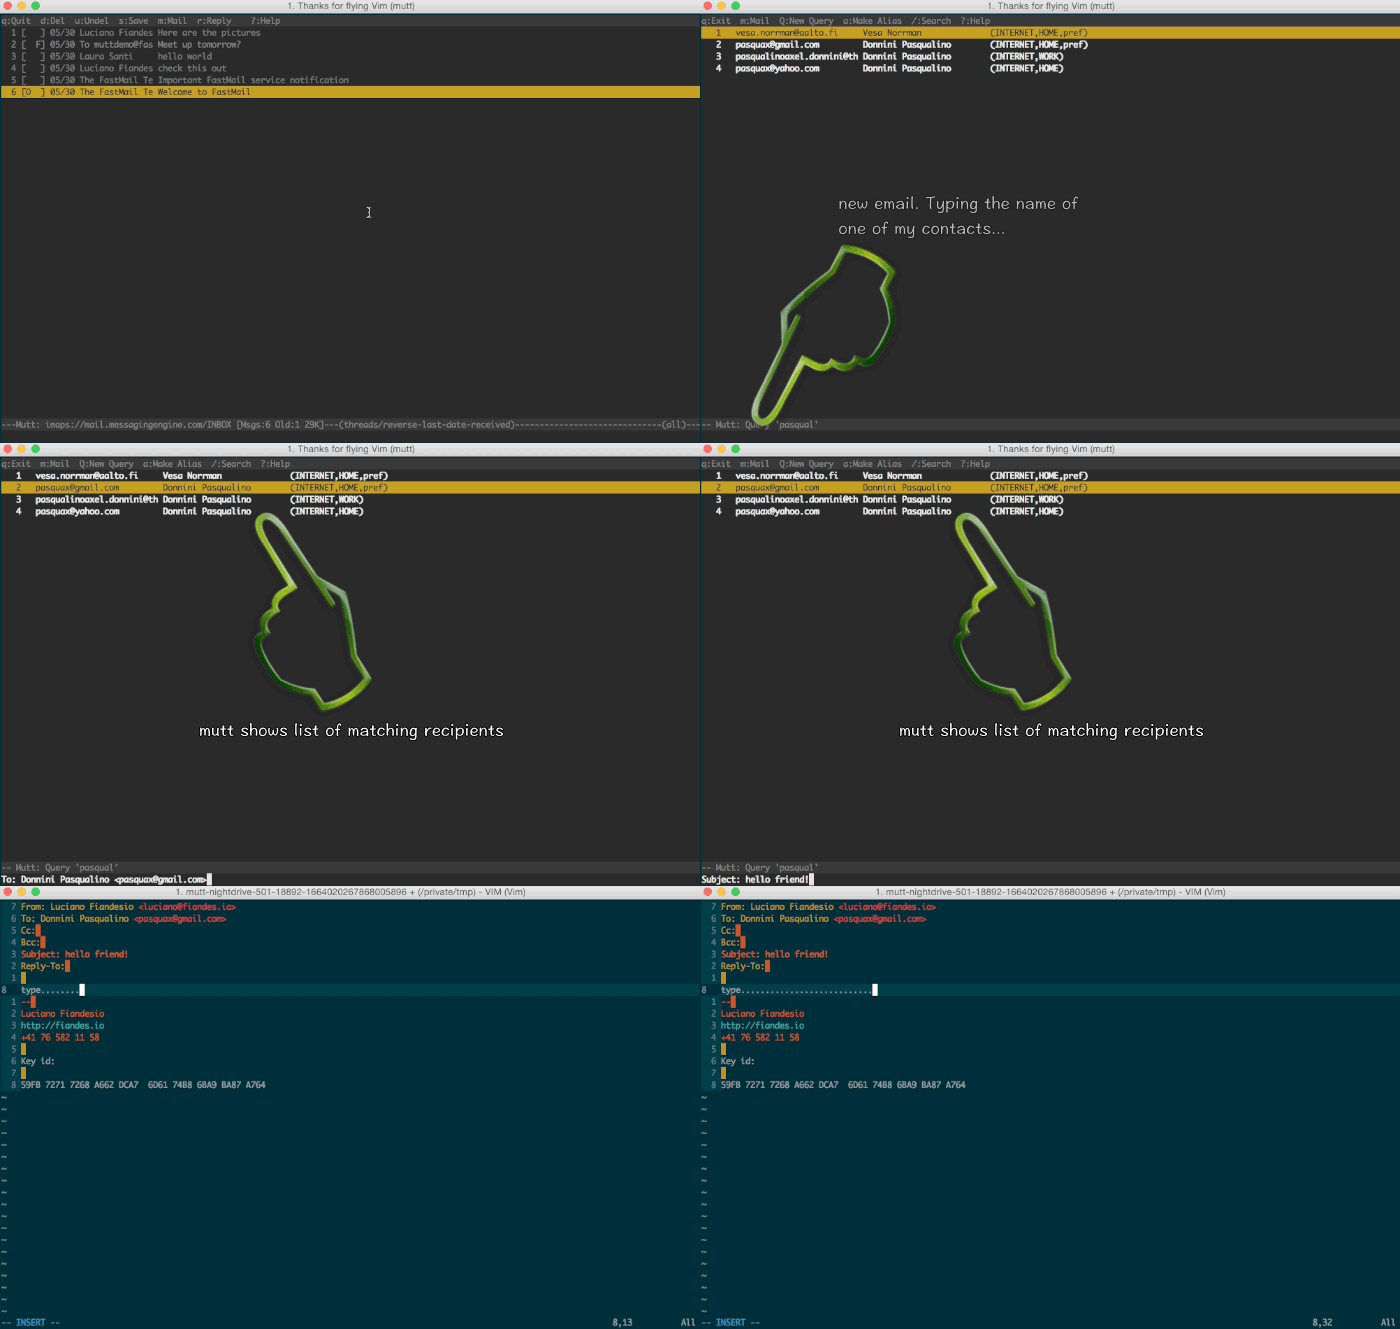
Enter pycarddav. pycarddav is a CardDav CLI client with built in support for mutt’s query_command.
The setup takes a couple of minutes:
Install pycarddav:
pip install pycarddav
Create a configuration file with the credentials of the CardDav server and syncronize:
pycardsyncer
Test:
pc_query Barack
...
Name: Barack Obama
TEL (CELL, VOICE, pref): 123446767
TEL (WORK, VOICE): 999999999
EMAIL (INTERNET, HOME, pref): barack@whitehouse.org
Now, it is possible to configure mutt to search the contacts database using TAB when composing. Add this entry to the mutt .muttrc file.
set query_command="pc_query -m '%s'"

The sidebar
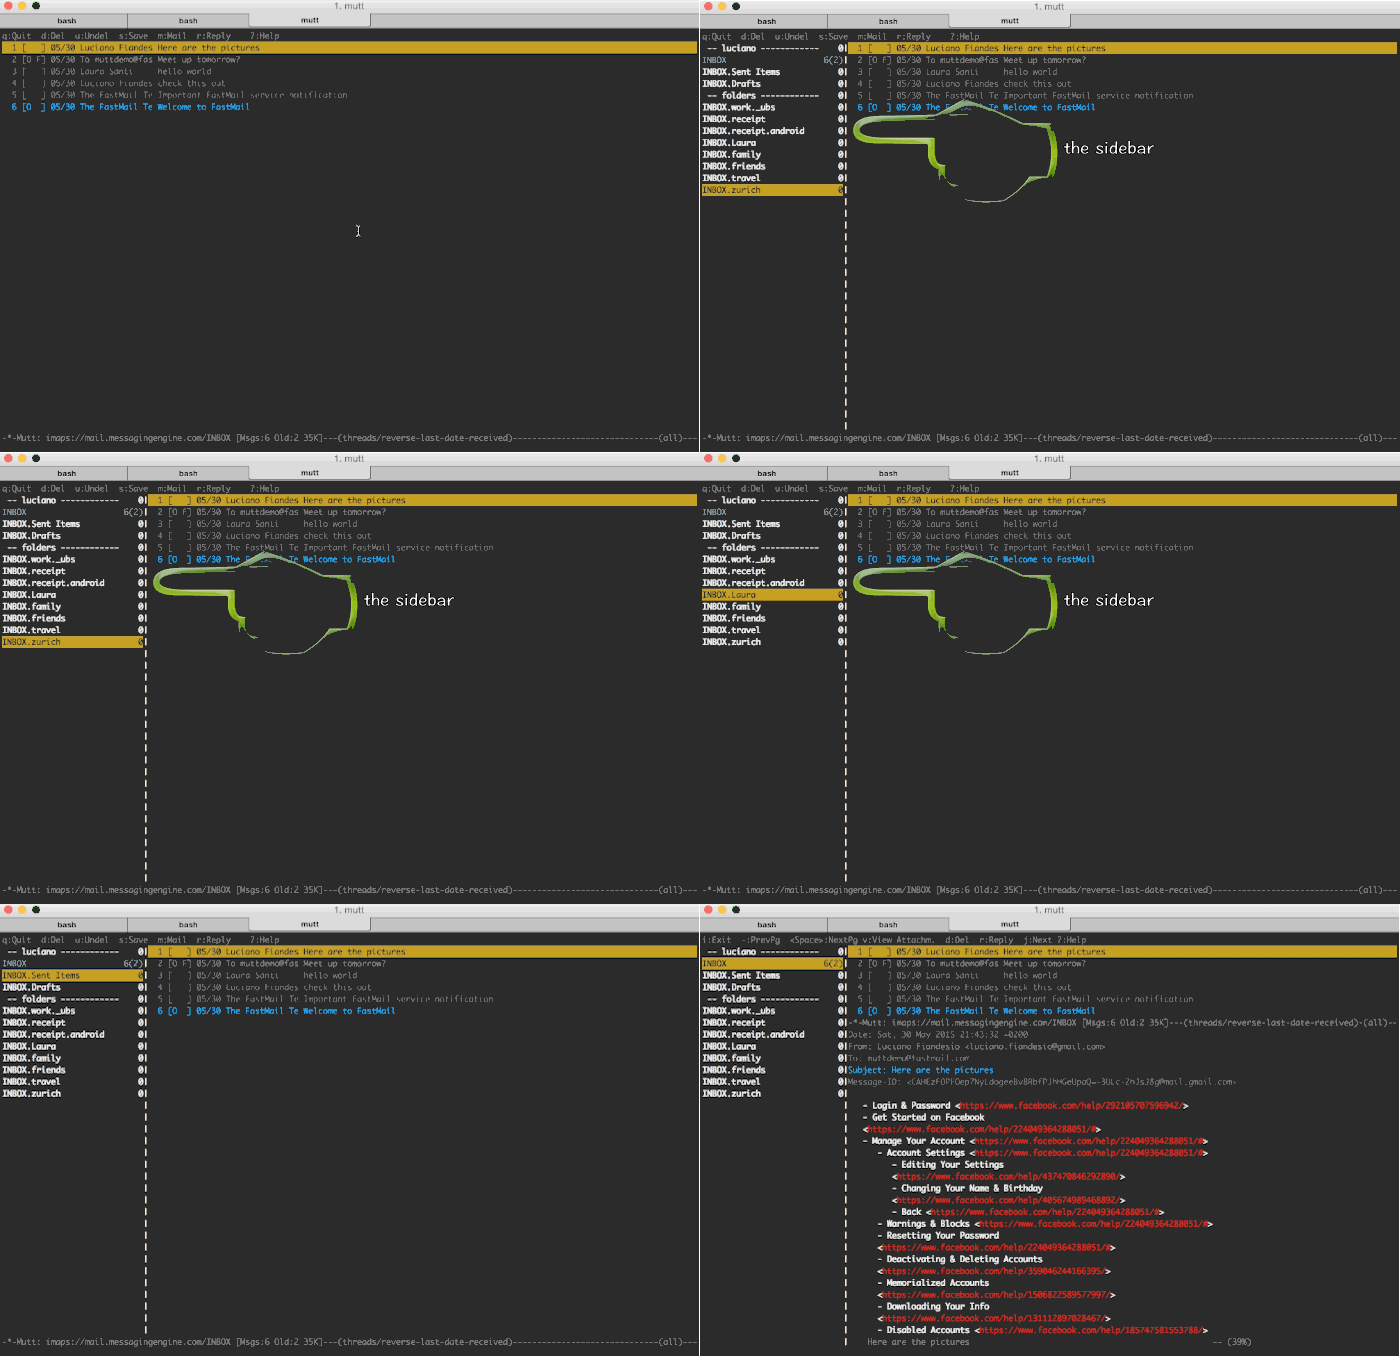
The sidebar it’s an handy right-side panel that shows a configurable number of IMAP folders and the number of messages that each folder contains. I keep it hidden by default, and display it when needed.

The folders displayed in the sidebar must be specified in the .muttrc file, like so:
mailboxes "+-----------------" \
      imaps://$my_server/INBOX \
      "imaps://$my_server/INBOX.Sent Items" \
      "imaps://$my_server/INBOX.Drafts" \
      "+-- folders ------------" \
      "imaps://$my_server/INBOX.folder1" \
      imaps://$my_server/INBOX.folder2 \
      imaps://$my_server/INBOX.folder3.subfolder \
      "imaps://$my_server/INBOX.folder4" \
      "imaps://$my_server/INBOX.folder5" \
      "imaps://$my_server/INBOX.folder6" \
      "imaps://$my_server/INBOX.folder7" \
      "imaps://$my_server/INBOX.folder8" \
Fine-tuning
It’s easy to geek out with mutt’s configuration. There are tons on parameters. My approach is to start with a simple configuration and snoop at other’s people .muttrc files. These are some settings that I have been using since start using mutt.
set sort              = threads
set sort_aux          = reverse-last-date-received
Gmail-style threading.
set pager_stop
Stop mutt showing the next message when we are at the end of the current message’s body.
set fast_reply
set include
Quick reply, makes mutt to stop asking lots of questions.
set reverse_name
set envelope_from
Pre-fills the “From” address when replying to emails, based on the email account that received the original mail. Useful in case of multiple accounts or multiple aliases (like in my case).
As I mentioned early, I like writing in Vim. This is how I tell mutt to open Vim when composing an email:
set editor = "vim +/^$ ++1 -c 'set tw=76 expandtab nosmartindent spell'""
Here are a bunch of mutt dotfiles that I have used for inspiration.
Dave Pearson mutt configuration
GPG
mutt and GPG works pretty much hand in hand, no biggie, given that you have your GPG stuff all setup (I assume that if you made it so far, you are probably an avid GPG user). My configuration is shamelessly copied from this 2014 article on mutt and GPG. Just remember to brew mutt with the --with-gpgme flag and install gpgme (brew install gpgme).
I like to sign all my outgoing mail. Easily done with this option set.
set crypt_autosign=yes
With recent version of GPG, mutt output an error on startup that says Using GPGME backend, although no gpg-agent is running. I think there is a patch floating around, but I didn’t bother applying it, because it works.
Markdown
I use Roguelazer’s muttdown to send HTML email written in markdown. Before muttdown, which is a quite recent project, I was using a mutt macro based on pandoc (something similar to what is described here). muttdown is a sendmail replacement that transparently compiles annotated text/plain mail into text/html.
I just need to start my message with !m to trigger the markdown compilation.
To use muttdown:
git clone https://github.com/Roguelazer/muttdown.git
cd muttdown
python setup.py install
Create a configuration file, .muttdown.yaml
smtp_host: mail.messagingengine.com
smtp_port: 587
smtp_ssl: false
smtp_username: xxx@fastmail.fm
smtp_password_command: security find-internet-password -w -a xxx@fastmail.fm
In .muttrc add:
set sendmail = "muttdown -c /path/to/.muttdown.yaml"
Bindings and macros
The default key binding for mutt is quite reasonable. mutt allows to bind the same keystroke to different action in each view (index, pager, browser, attach, etc. - mutt calls the views “menus”).
I favor a Vim-like binding, mostly for navigating the email list and the email body.
mutt offers rudimentary macros as well. Macros in mutt are essentially a way to automate keystrokes.
To get an idea of how a macro looks like, take a look at this macro. It is triggered by the TAB key and it’s only available in the index menu (the message list). When triggered, it shows the next unread message and press enter.
macro index <tab> <next-unread><enter>
Here is my binding file.
This is an awesome, interactive mutt cheatsheet for getting started with the key binding.
HTML emails
You can throw any kind of attachment to mutt, as long as the type is specified in a mailcap file. My mailcap file looks like this:
application/msword; ~/.mutt/view_attachment.sh %s "-" '/Applications/TextEdit.app'
#
# # Images
image/jpg; ~/.mutt/view_attachment.sh %s jpg
image/jpeg; ~/.mutt/view_attachment.sh %s jpg
image/pjpeg; ~/.mutt/view_attachment.sh %s jpg
image/png; ~/.mutt/view_attachment.sh %s png
image/gif; ~/.mutt/view_attachment.sh %s gif
#
# # PDFs
application/pdf; ~/.mutt/view_attachment.sh %s pdf

#
# # HTML
text/html; ~/.mutt/view_attachment.sh %s html; copiousoutput
#
# # Unidentified files
application/octet-stream; ~/.mutt/view_attachment.sh %s "-"
The “mailcap” file is just a way to map a MIME type to an application that can handle it. I’m using the view_attachment.sh script, which is mentioned in the mother of all mutt articles. It works well for me.
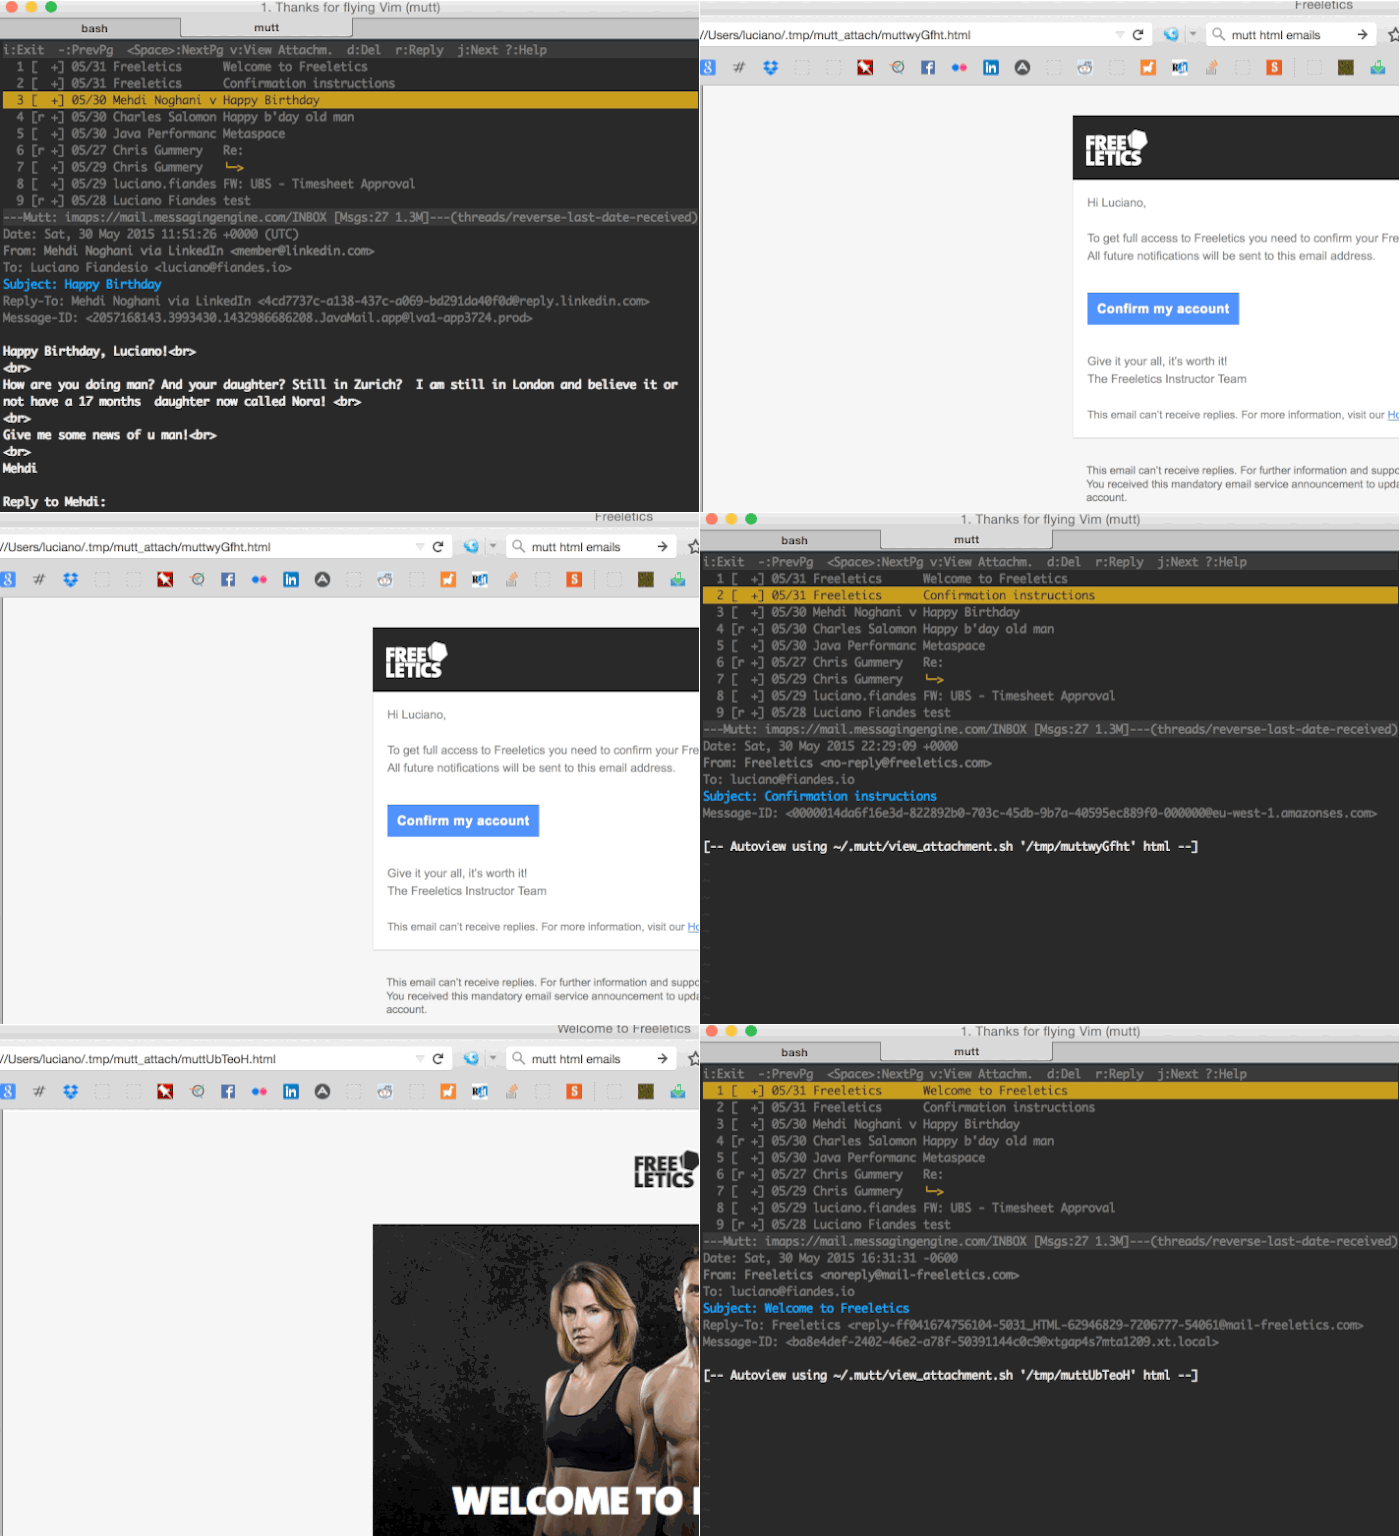
Once the “mailcap” file is sorted, mutt can auto-open HTML emails with an entry in the .muttrc file:
  auto_view text/html                                      # view html automatically
  alternative_order text/plain text/enriched text/html     # save html for last

Colors
I’m lazy, so I use the Solarized theme for mutt, available here.